Getting Started
Implementing the WATI WhatsApp provider requires four primary steps: creating a WATI account, setting up the WhatsApp Business API, generating a WATI API token, and configuring the WATI integration within your Comify platform.Creating a WATI Account
Follow these steps to set up your WATI account:- Visit WATI’s official website and select “Sign Up Free”.
- Enter all required information to create your account.
- Complete any verification process if prompted.
- Once verification is complete, you’ll be directed to your WATI dashboard.
Setting Up WhatsApp Business API with WATI
Before generating an API token, you’ll need to set up your WhatsApp Business API:- In your WATI dashboard, navigate to the WhatsApp connection setup section.
- Follow the guided process to connect your business number with the WhatsApp Business API.
- WATI will guide you through the necessary Facebook Business Manager verification steps.
- Complete the business verification process, which may include providing business documentation.
- Set up your WhatsApp Business profile with your business information, logo, and description.
Business Requirements for WhatsApp Business API
Before proceeding, ensure your business meets these requirements:- Valid Business Identity: Your business must be officially registered and possess a clear identity that WhatsApp can verify.
- WhatsApp Business Policy Adherence: Ensure your business operations align with WhatsApp’s Business Policy.
- Customer Consent: You must obtain consent from customers before reaching out to them via WhatsApp.
- Dedicated Phone Number: A dedicated phone number that will serve as your business’s WhatsApp identity.
- Business Website: A verifiable business website adds credibility and serves as a digital footprint.
Creating a WATI API Token
Follow these steps to generate and secure your WATI API token:- In your WATI dashboard, navigate to the API section.
- Look for the API token generation option (typically under “Settings” or “API Documentation”).
- The API token can be found under “API docs” in the WATI user interface.
- Copy the generated token immediately and store it in a secure location.
- Note: Access tokens are app and user-specific. Please do not share the token with anyone, nor post it publicly.
Creating a Comify API Key
Before configuring the WATI integration, you’ll need to generate a Comify API key for authentication:- Access your Comify account dashboard.
- Navigate to the API Keys management section at https://cloud.comify.io/settings/api-keys.
- Select “Generate API Key” if not already generated.
- Provide a clear, descriptive name for your key (e.g., “WATI WhatsApp Integration”) to facilitate future management.
- Copy and store this API key in a secure location. You’ll use this key in your application code to authenticate requests to the Comify platform.
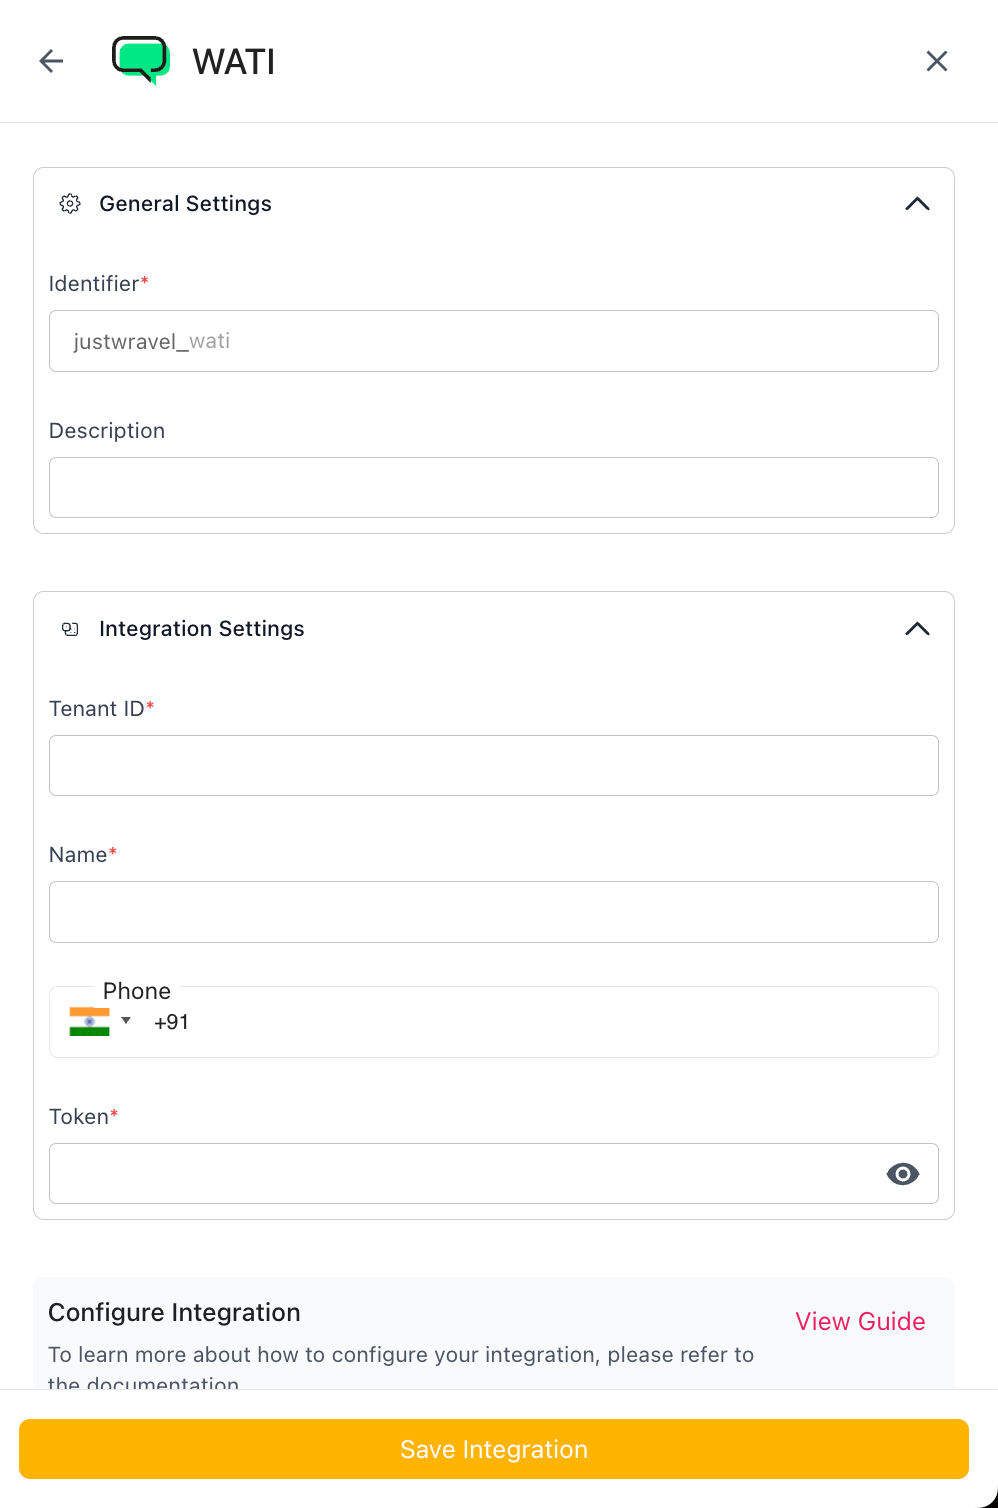
Configuring WATI Integration in Comify
To establish the connection between Comify and WATI:- Sign in to your Comify platform dashboard.
- Navigate to Integration Store > Add Integration > WhatsApp.
- From the available WhatsApp service providers, select WATI.
- Enter the WATI API token you generated earlier.
- Configure any additional provider-specific settings according to your requirements.
- Click Save to finalize the integration.
Creating WhatsApp Message Templates
After successfully configuring the WATI integration, you’ll need to create and get approval for WhatsApp message templates:- Navigate to the Manage Templates section in your Comify dashboard.
- Select the
WhatsApptab from the available channel options. - Click
Create Templateto begin the design process. - Choose from multiple template creation methods:
- Pre-approved Templates: Select from WhatsApp’s pre-approved template categories.
- Custom Templates: Create your own template following WhatsApp’s guidelines.
- AI-Assisted Design: Utilize the
AI Writerfeature for automated content generation that follows WhatsApp’s guidelines.
- Add variables to personalize your templates where needed (e.g., customer name, order number).
- Submit your template for WhatsApp approval (this may take 24-48 hours).
Understanding WhatsApp Message Types
WhatsApp Business API supports several types of messages:- Session Messages: Responses to customer-initiated conversations (24-hour window).
- Template Messages: Pre-approved message templates for business-initiated conversations.
- Interactive Messages: Messages with buttons, list messages, or reply buttons.
- Media Messages: Images, documents, videos, and other rich media content.
Sending WhatsApp Templates
Implement the following code examples in your application to trigger WhatsApp template delivery:- Node.js
- Node.js (Fetch)
- Python
- Ruby
- PHP
- Go
- Curl