
Looking for a dynamic audience that re-qualifies automatically? See Segments. For a side-by-side comparison, see Create an Audience.
Create a list
From Template Manager → Audience List, click + New audience → List. You get two ways to build it: From a rule or Upload CSV.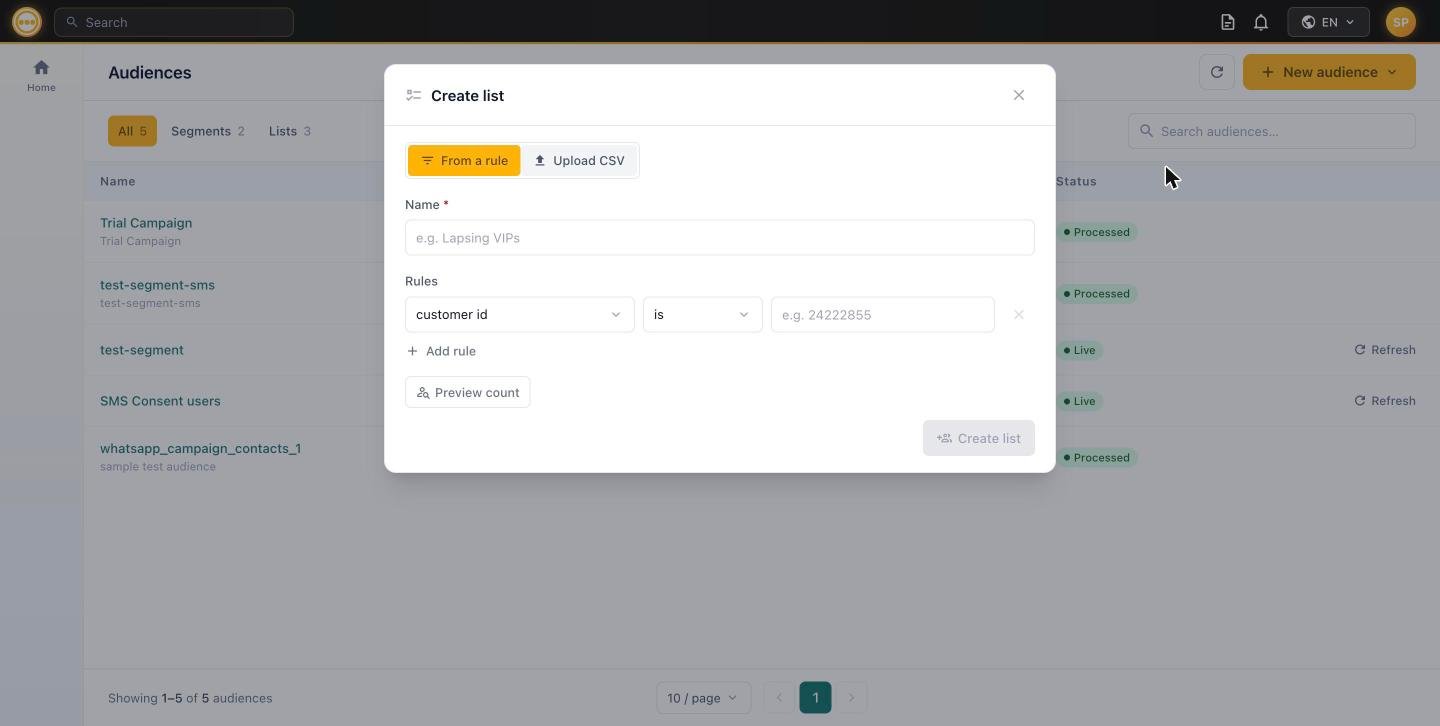
Create list — From a rule
From a rule
This uses the exact same Name + Rules builder as a Segment — the same fields, the same operators, the same + Add rule and Preview count behavior. See the Segments rule reference for the full field and operator inventory. The difference is what happens after you click Create list: Comify captures a one-time snapshot of everyone who currently matches your rules. New contacts that later start matching the rule are not added automatically, and contacts that stop matching are not removed — the list stays exactly as it was captured.Upload CSV
Switch to the Upload CSV tab to import contacts directly from a file.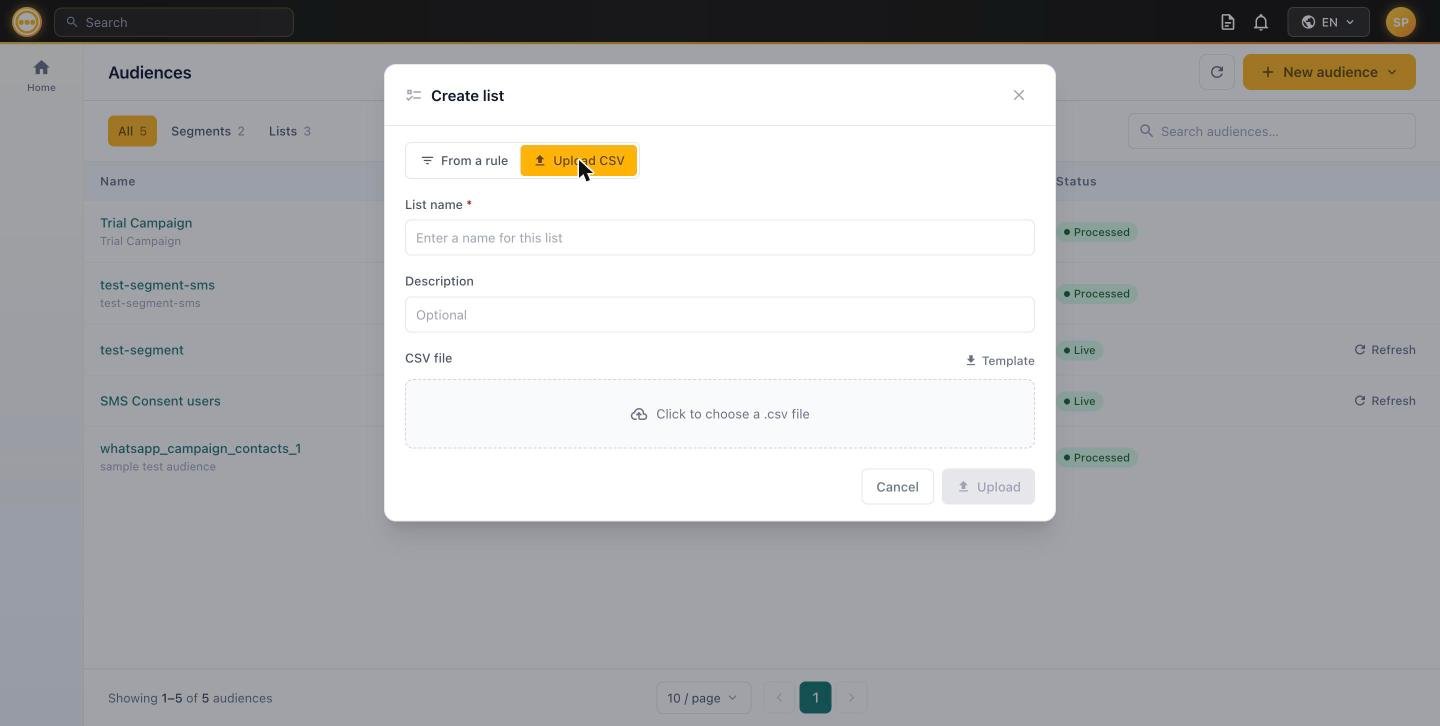
Create list — Upload CSV
1
Name the list
Enter a List name and an optional Description.
2
Download the template (recommended)
Click Template to download a CSV pre-filled with the expected column headers, so your file maps cleanly to Comify’s fields without a manual re-mapping step.
3
Upload your file
Click the dropzone to choose a
.csv file, then click Upload.Uploaded lists appear in the Audiences page as pending while rows are validated, then flip to Processed once ready to use.
Lists are not editable after creation
This is the key behavioral difference from Segments: once a list is created, it cannot be reopened or edited — regardless of whether it was built from a rule or uploaded as a CSV. Clicking a list’s row in the Audiences list does nothing (unlike a segment’s row, which reopens the rule builder). To change who’s in a list, create a new one or upload a fresh CSV. There’s also no Refresh action on list rows — that control only appears on Live segments, since a list’s membership is fixed by design.Using a list in a campaign
Lists are selectable from the Audience step of any campaign — Email, SMS, or WhatsApp — under Select existing → Campaign audiences.Next steps
- Need membership to stay current automatically? See Segments.
- Create an Audience — Segment vs. List comparison.
- Create a campaign using this list.