
This is a dashboard walkthrough. Screens are captured from cloud.comify.io → Template Manager → Campaign Manager.
Getting started
From Template Manager → Campaign Manager, click Create campaign, give it a Name and optional Description, and select SMS under Channel. Click Create campaign to open the wizard — the stepper shows Audience → Content → Scheduling, and you land on the Audience step.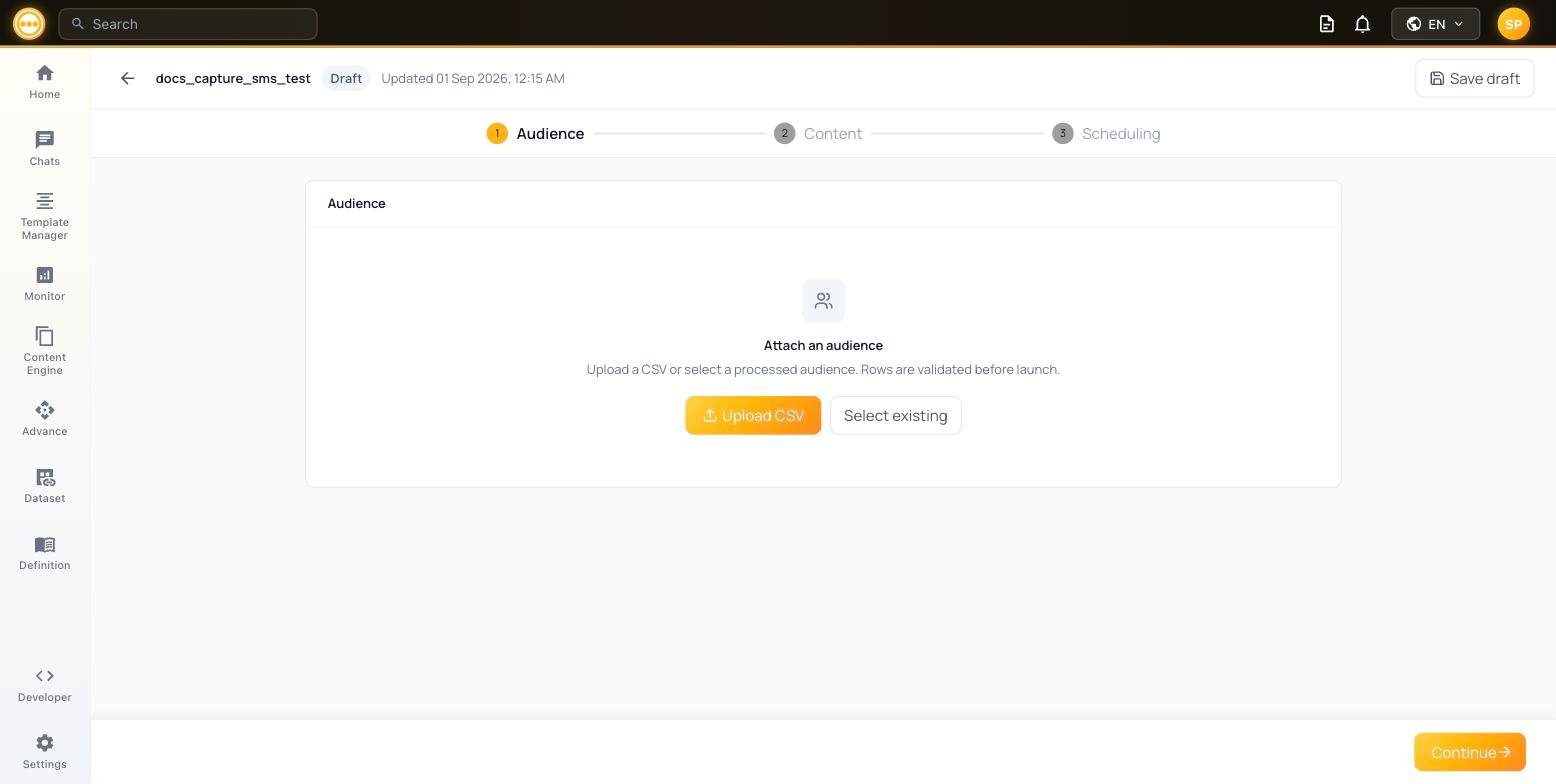
SMS campaign — Audience step, before attaching
Attaching an audience
Upload CSV
Upload a new CSV file with your contacts. Rows are validated before the campaign launches. Each column in your CSV becomes an available field for variable mapping in the next step.
Select existing
Pick from a previously uploaded audience list or a dynamic segment. New uploads appear as “pending” until processing completes.
Selecting an existing list
Click Select existing to open the audience picker, with two tabs:SMS campaign — audience picker
After attaching an audience
Once an audience is attached, Comify shows a summary of the list, its Available fields, and a sample of the first rows so you can verify the data before proceeding.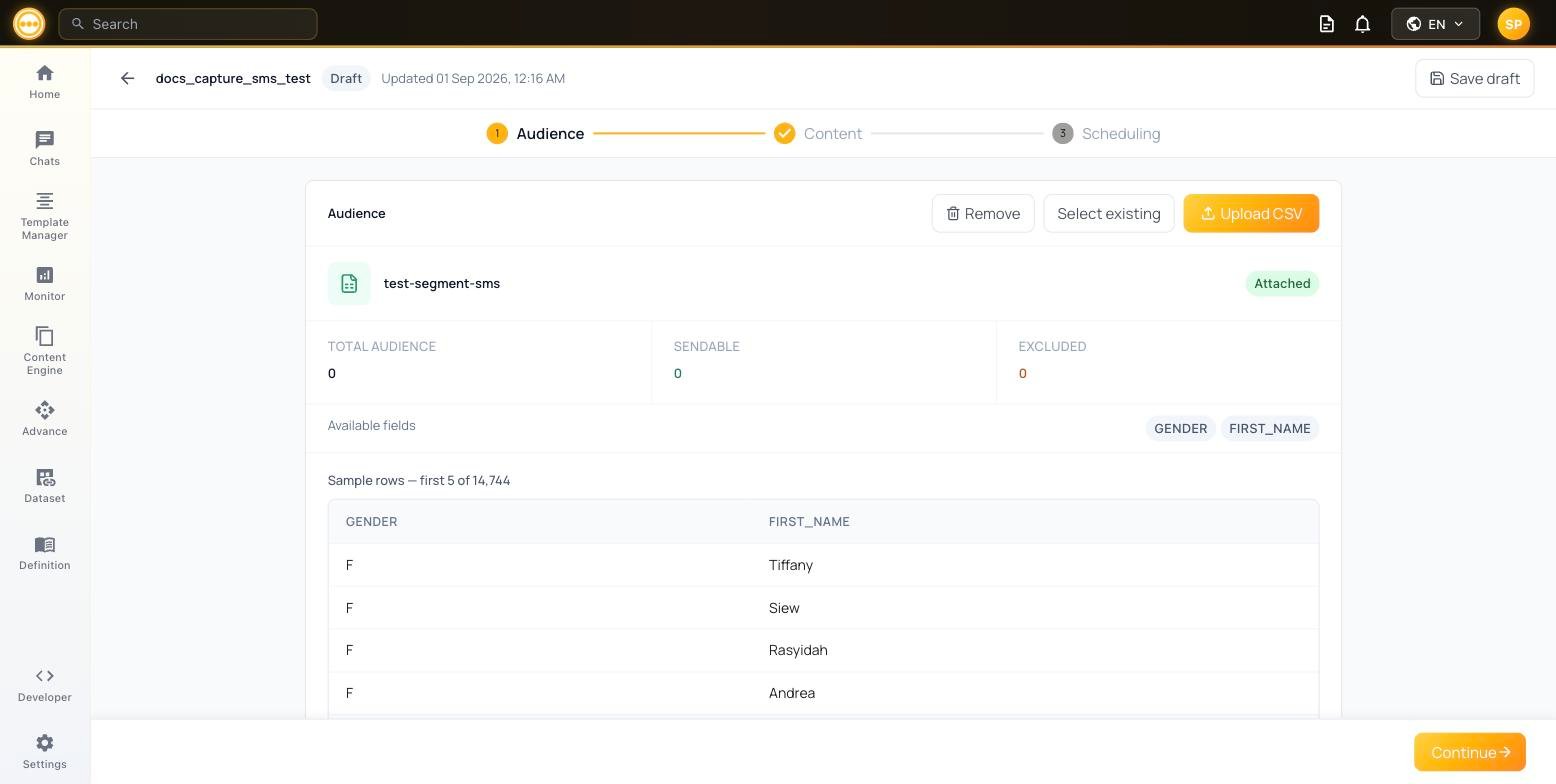
SMS campaign — audience attached